
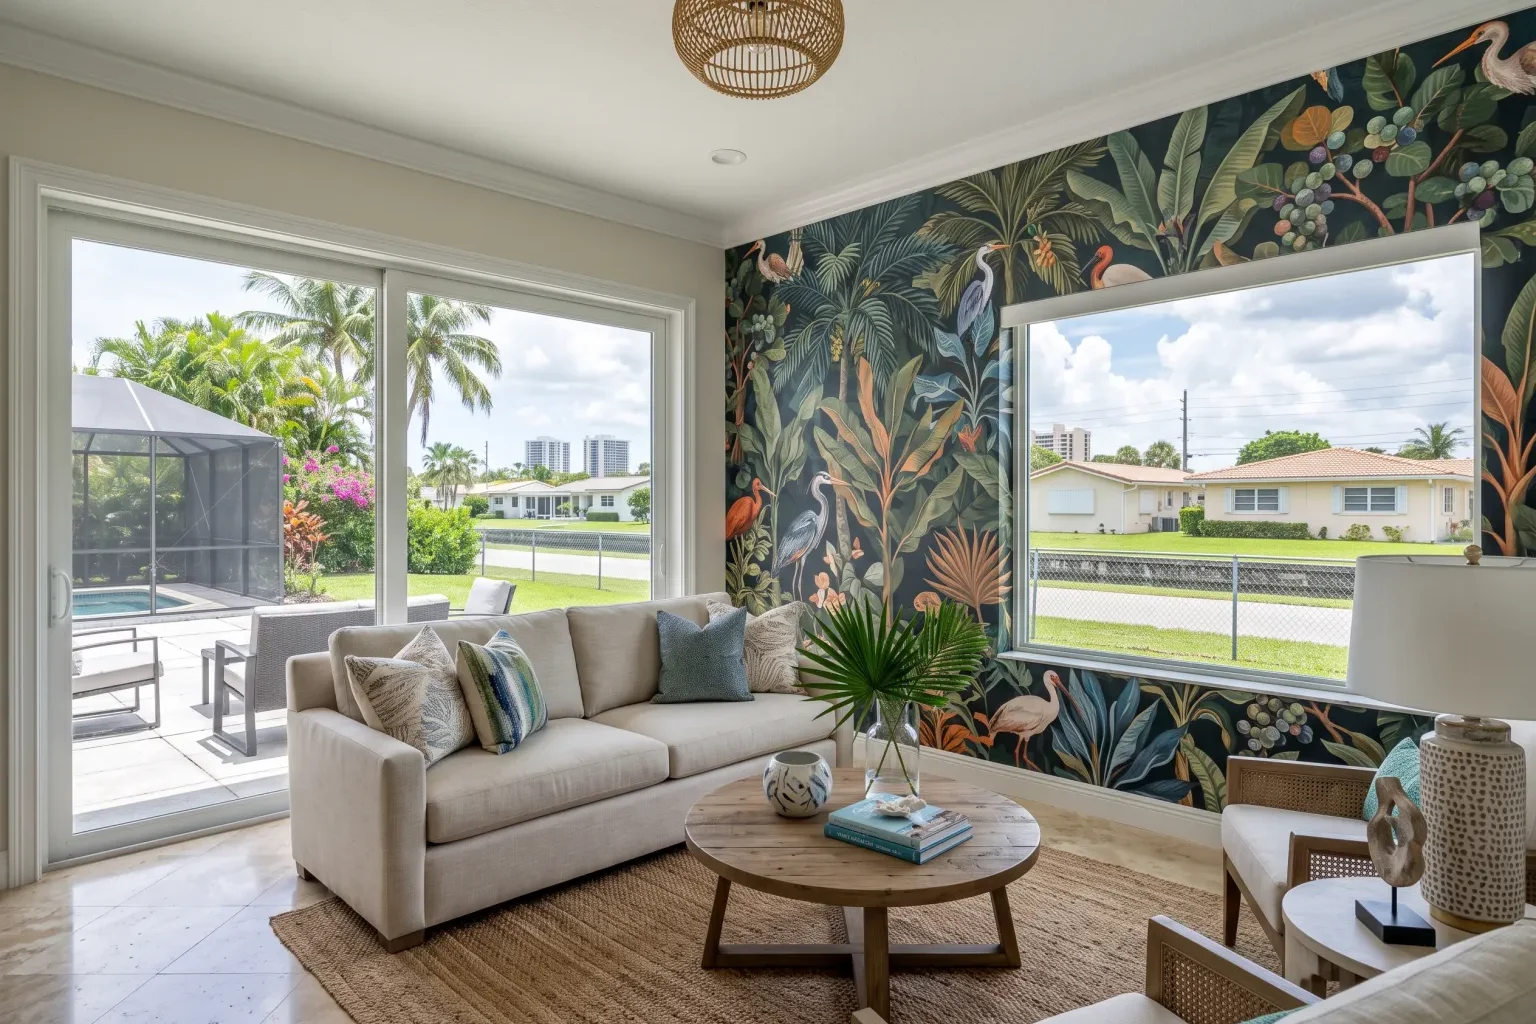
The short answer
A mural is the right choice when you want one wall to carry a single large image rather than a repeating pattern, usually a feature wall in a bedroom, dining room, nursery or office. Good results depend on a smooth, primed wall, careful measuring and centering, and precise panel alignment, and the cost depends on wall condition, paper type, panel layout, room size and ceiling height.
A wall mural turns one surface into a single, continuous image: a forest scene, a hand-painted botanical, a soft watercolor wash, a city skyline. Unlike standard wallpaper that repeats every couple of feet, a mural is printed across a set of numbered panels that only works if every panel lands exactly where it belongs. Custom Wallpaper Installer handles mural installation for homeowners in Pompano Beach and surrounding South Florida communities, from checking the wall before anything is ordered to trimming the last edge. This page explains when a mural makes sense, how we prepare the wall, how the installation works step by step, what drives the cost, and how to keep the finished wall looking good.
When a Mural Is the Right Choice for a Room
Murals work best on one uninterrupted wall that people see as soon as they enter the room. The wall behind a bed, the far wall of a dining room, the back wall of a home office that shows up on video calls, or a nursery wall are common choices. Because the image is continuous, every window, door, outlet and built-in cuts into it, so a wall with few interruptions shows the design most clearly.
A mural can also help a room feel larger or more focused. Landscapes and horizon lines add depth to a small space, while a large-scale botanical or abstract print gives an open-plan room a clear anchor. If you prefer a quieter look, or want to cover several walls, a repeating wallpaper may be a better fit, and we can help you compare the two.
- Good fit: a single feature wall with minimal windows, doors or vents
- Good fit: rooms where you want one strong focal point
- Less ideal: walls broken up by many openings, or heavily textured walls you don't want to skim
- Less ideal: when you plan to cover every wall in the room with the same design
How We Prepare and Prime the Walls
A mural shows every flaw underneath it, so preparation takes real time. We start by looking at the wall's condition: old wallpaper or adhesive residue, peeling or glossy paint, nail holes, cracks, and texture such as orange peel or knockdown. Any old covering is removed, holes and dents are patched, and textured walls are skimmed smooth when needed so the image doesn't pick up bumps and shadows.
After repairs are sanded and cleaned, we apply a primer made for wallcoverings. Primer evens out how the wall absorbs adhesive, helps the panels grip, and makes future removal easier on the drywall. In South Florida, moisture matters too. May through October is hot, humid and wet, so we check for signs of dampness, especially on exterior walls and in bathrooms, and we give patches and primer the drying time they need before hanging anything.
The Installation Process, Step by Step
Mural panels are printed in sequence, and the order is set before the first panel goes up. Here is how a typical installation works.
- Measuring: We measure the wall's width and height at several points, because walls and ceilings are rarely perfectly square. These measurements decide where the image sits and how much extra is trimmed at each edge.
- Planning the layout: We lay out the numbered panels and decide how the image should be centered, so key parts of the design, such as a tree trunk or a horizon line, aren't hidden behind a headboard or cut off at a corner.
- Setting a plumb line: Instead of trusting the wall's edge, we mark a true vertical line with a level or laser. The first panel follows that line so the rest of the mural stays straight from floor to ceiling.
- Hanging and matching panels: Each panel is pasted (or the wall is pasted, depending on the paper type) and hung in order. We line up the image across each joint so lines, shapes and colors carry through without a visible jump.
- Seams: Depending on the product, panels are butted tightly together or overlapped and double-cut for a clean joint. Seams are rolled gently and excess adhesive is wiped off right away so it doesn't dry on the surface.
- Trimming: Once the paper sits correctly, we trim along the ceiling, baseboard, corners, and around outlets, switches and window casings with a sharp blade and a straightedge for crisp edges.
- Final check: We look over the wall in different lighting for bubbles, lifted edges and misalignment, and fix anything before we leave.
What Affects the Cost of Mural Installation
Every mural job is quoted after we understand the wall and the product. These are the main factors that change the amount of labor and materials involved.
- Wall condition: Removing old wallpaper, repairing damage or skimming texture adds preparation time before the mural can go up.
- Paper type: Paste-the-wall nonwovens, traditional paste-the-paper materials, peel-and-stick panels, and heavier vinyls or specialty finishes each handle differently and take different amounts of care.
- Pattern and panel layout: Most murals don't repeat, but the number of panels, how precisely the image must line up, and whether panels overlap for double-cutting all affect time. Murals combined with a repeating border or side pattern add matching work.
- Room size and ceiling height: Larger walls mean more panels to hang, and tall ceilings, stairwells or vaulted walls require scaffolding or extra ladder work.
- Openings and obstacles: Windows, doors, built-ins, vents and many outlets require more cutting and fitting.
Caring for Your Finished Mural
Give the adhesive a few days to cure fully before hanging artwork, pushing furniture against the wall, or cleaning. During that time, keep the room at a steady, comfortable temperature and avoid aiming fans or vents directly at the wall.
For routine care, dust the surface with a soft, dry cloth or a vacuum brush attachment. Many murals can be wiped with a damp sponge and mild soap, but check the care label for your specific paper first, since some uncoated or textured papers should not get wet. Avoid harsh cleaners and abrasive pads. Running air conditioning or a dehumidifier during the humid months helps keep seams flat, and any edge that starts to lift should be addressed early before it catches and tears.
Mural Installation by city
- Mural Installation in Lighthouse Point
- Mural Installation in Hillsboro Beach
- Mural Installation in Deerfield Beach
- Mural Installation in Coconut Creek
- Mural Installation in Lauderdale-by-the-Sea
- Mural Installation in Margate
- Mural Installation in Oakland Park
- Mural Installation in Boca Raton
- Mural Installation in Wilton Manors
- Mural Installation in North Lauderdale
- Mural Installation in Lauderdale Lakes
- Mural Installation in Fort Lauderdale